Showing posts with label quilts. Show all posts

29 March 2015

By wisdom a quilt is built

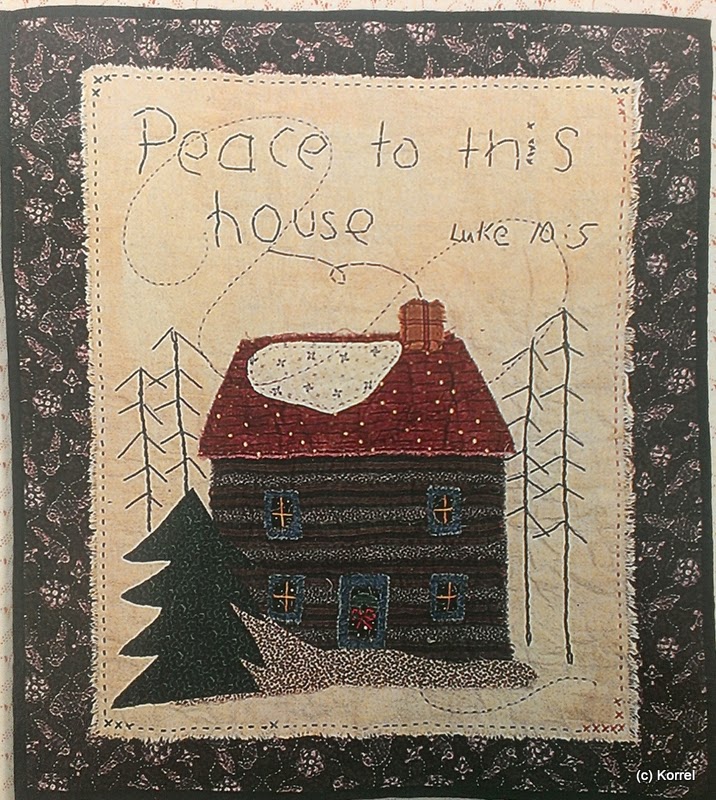
A number of years ago I saw a pattern for a quilt that I knew would be perfect for my sister-in-law, except that just about everything was wrong for her. The quilt was a block of the month. Each block featured a house and a scripture verse about homes. My sister-in-law is the original home maker, so I knew she would love the concept, but she wouldn't love the technique or the colours (and they didn't do much for me either). It was shabby/naive design, which  wouldn't appeal. The quilt was dark country colours, which don't appeal to me and would appeal to her even less.  So, I adapted.


Step 1 was to move the blocks about to suit the Australian calendar. Instead of winter blocks at the start and finish I wanted them in the middle. Each block is a different shape so I had to work how to rearrange 'blocks of blocks'. If you look at the original pattern you'll notice there's essentially three large "blocks" - a strip of three on the left, a set of two rows at the top and two rows plus a large double sized block at the bottom. My arrangement ended up with vertical strip on the left and the two others flipped, and then a few rearrangements within each of those three sets.
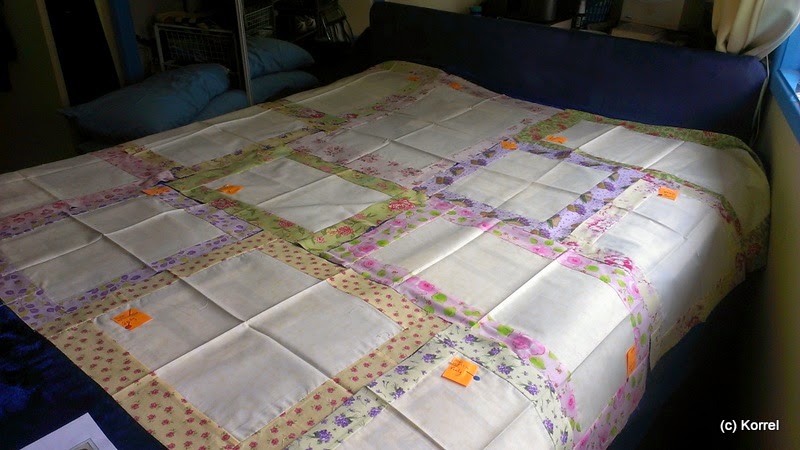
Blank, sashed blocks finally fitting together (tags to remind me which block was which)

Step 2 took me several years. The original pattern had the background for the appliqué houses appliquéd to a second background. I decided to turn the second, larger background into sashings. Each block of the quilt is a different size with different size sashings. I very carefully put all the measurements through Excel. Centre piece dimensions taken off the outer piece dimensions and divided by two, and add seam allowances.  That is, if the centre piece was 6 inches x 6 inches, and the outer piece was 10 inches by 10 inches the TOTAL sashing width would be 4 inches, each sashing would therefore by 2 inches.

Unfortunately, left/right and top/bottom dimensions for most blocks were different, and I swapped them around in my calculations. After I'd sewn each block I realised my mistake. I had to unpick and reset half the blocks. Totally screwed my head in the process. I wanted all the sashings finished before I started appliquéing so I could use left-over sashings in the houses to create visual ties.

Finally, about two years ago, the blocks were all the right size. For my sister-in-law I chose to use pastel colours in keeping with her tastes. The houses slowly came together. None were particularly onerous, I just had to find time.
Finished blocks

I also changed the stitcheries. The original text looked like it was written by a petulant teenage boy. I chose to use my own handwriting. I matched thread colours to the sashing colours, just not in the same block (i.e. I had green sashings and green thread, but not necessarily together). I simply aimed for a balance of colour across the 12 blocks.
My interpretation

Original block

Finally, I changed the quilting. The original quilting was a single squiggle through the middle of each block. I had originally thought I'd cross hatch each block's background, but I realised that would mean sewing over the stitchery, which I didn't want to do. Instead I decided to simply outline each house and stitch-in-the-ditch each block.

My interpretation

Original block.
I swapped the verse on this block with another, so I could keep this verse with my Christmas/December block.
Instead stitching in the ditch between blocks, I used an 'S' stitch on my machine. I love this stitch for not-quite-stitching-in-the-ditch. When you stitch in the ditch you have to be exact to ensure the stitching doesn't 'slip' and ruin the look. With the 'S' stitch, there's no issue - it's supposed weave across the centre line, not sit perfectly on it.

The quilt was finished late 2014 and delivered to very happy sister-in-law who loves it.
Finished quilt
 My advice if you see a pattern you like, but it doesn't suit your decor or the intended recipient's style, just change it. There is no law that says you have re-create a pattern exactly as the designer imagined it. It's your creativity, your art, your choice.

15 March 2015

365 Challenge Rebooted

In the sidebar of my blog there is a "I'm making something 365" badge. Hmmm ... I was. Life happened. Perfectionism happened. Creativity stopped happening. The 365 creative challenge is simply to make something creative every day for a year. To help, Noah put together a book with 365 ideas. The problem was, I started adding rules. Naturally, it all got to hard, so I quit.

This year I rebooted. My 'rules' are simple -
- design a quilt, or other sewing project, every day
- by design I mean - scribble, describe, stick-figure type drawing, full blown pattern. It really doesn't matter - just something on paper. I do not have to intend to ever develop the idea. I do not have to intend to actually make the object. I just have to put something on paper in response to the prompts given in Noah's book
- use the book as an point of inspiration only. If it suggests building something out of clay, I don't have to actually use clay - as in, get my hands dirty sort of clay. I just use the word 'clay' to give my thoughts a direction.

I did really well in January. Then I had to go back to work. Carting my sketch book on the train every day was just that little extra weight I didn't want to carry. I've gotten a little slack and side-tracked.  I'm still working out how to overcome that. And that's okay because life as a recovering perfectionist is about recovery every day.

At the moment, I have nearly 50 designs/scrawls/scribbles. Some of them I know I'll never ever make. Some of them I have made in the past - which was one of my 'rules'. Past creations were allowable. They're my creative effort (I rarely follow someone else's pattern, preferring to make my own glorious mistakes and triumphs). There are few that I really want to make. There are a few that really inspire me.

Just a couple for your amusement:
Day 31: Make a path for people to follow and invite people to try it out.

 One of my more structured designs. I actually was aiming for paths that cross over and under each other. But I got sidetracked by trying to make my blocks simple half-square-triangles. I probably won't be making this one.

Day 21: Write a 10 word love story. Illustrate it.
The Teen wants me to make this one :-) It's a long story, but essentially, not long after we first met, in the midst of any apology that was supposed to involve bunches of flowers, husband-to-be offered to buy me a bunch of carrots instead. Tip for all the males out there: when you're apologising for something - try to keep your mind on the apologies, and not the conversation being conducted by the person sitting next to you! The 10 word love story is, "He asked me out with carrots. I eventually said yes."


Day 18: Work with the things you find in your car
This is an example of my rule to use the book as inspiration only and not the 'rules'. We were road-tripping, so instead of using 'inside the car', I chose to use outside the car.


Day 2: What's your favourite animal? Use it as your inspiration.
I have a number of favourite animals, but I do love fairy wrens. This is planned a set of placemats, which I am thinking of making at some point. The plan would be to deliberately make them all different. There are seven species, so more than enough to do a different one on each placemat.

One of the interesting things I've found about this challenge is the attitude of other people. Although I'm currently struggling to form a habit that sticks, I am determined to complete all 365 designs even if not in a single calendar year.

I happened to mention what I was doing to a quilting storekeeper (thankfully, not a local store). She all but scoffed, "Well, good luck with that!" And let me say - it was not a positive, uplifting wishing of luck! I was a little taken aback. She didn't know me from Adam (or Eve). For all she knew I could have already been a well-established designer. And whether I am or not, and I'm not, that's beside the point. It was pretty flipping rude for her discredit my ambition. I don't care who you are. I don't care what the dream is. Don't allow anyone - ANYONE - to pull it apart. And don't do it to anyone else.

There a great line in M*A*S*H, where Col Potter says, "If I had a horse who thought he was Man O' War, I probably wouldn't want to dissuade him. If you get my drift?" (probably badly paraphrased) His point was - if we dream bigger than we can achieve, we will achieve bigger than if we don't dream. (Of course, Frank Burns didn't get it ;-) )

Dream big, and "phft" to all the naysayers.

31 August 2014

Learning to be creative

I had lots of lovely comments about my Evolution of a Quilt post, particularly about the creativity involved. I believe we too often get caught up in the 'rules' of our art. The rules often have a well-meaning background - cotton for quilting because it doesn't stretch etc, but too often we buy into them so thoroughly as to stifle our individual creativity.
Folk Welcome, from Evolution of  Quilt

I quilt because it's a creative expression that appeals to me. It's a way, that works for me, to show my appreciation of individuals and to make something truly personal. Lots of my creative efforts over the years have come to naught, but just because one idea doesn't work out, isn't a reason to give it all away.

I choose to never even consider showing my quilts in a formal setting because because I don't want the 'quilt police' picking holes in my creativity or technique.

I was exposed to the possibilities of ignoring the rules years ago when a quilter showed me her 'inside out' quilt. It wasn't a raggedy quilt such as is common today. She'd simply sewn the top's patches together the wrong way, so the seams were on the outside. I'm not sure a lot of the ladies in the group thought it was 'kosher', but for me it was a mind-expanding moment.

I started to really feel some freedom in my creativity when I joined an online abstract quilters' group. Every month a word was chosen and everyone made an 8 inch square 'quiltlet' to represent that word. One month would a tangible object (sea, food, child), the next month would an intangible object (spirit, love, depression). I didn't regularly complete the challenge piece. I think I was studying and working at the time; and I wondered what I would do with all these 8 inch squares. I did draw a lot of them, developing concepts. And I loved seeing all the different ideas others had come up, using techniques I'd never heard of, or using ones I had heard of in totally different ways.

Later I started quilting sermons. I followed the same principle of an 8 inch square. I would sit in church with my artist sketch pad and draw images that came to mind. I'm sure some frowned on my endeavours (another example of people judging creativity). I think I made up 8 or 9 of the ideas. I can still tell you, five or six years later, what those sermons were. How many people remember last Sunday's sermon, let alone ones from years ago?

I had a lot of fun with these small quilts. I used different fabrics: velvets, satins, plastics. I used embellishments: chain, beads, rocks. I pieced, I appliqued.

Crossing the River Jordan into the Promised Land (2006)
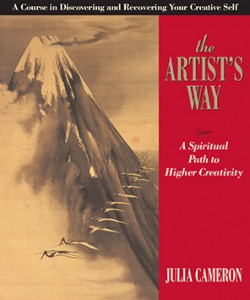
I've just started reading a book called, "The Artist's Way: A spiritual path to higher creativity", which I'm hoping will help me take further steps in developing my creativity, rather than merely mimicking the creativity of others.
Julia Cameron's book (available from her website)

My encouragement to everyone and anyone is just do it. If being self-creativity is scary, take baby steps. If you always religiously follow a pattern, choose a pattern you like, but make it in a completely different colour way. If you always do patchwork, make a small wall-hanging or cushion cover in applique. If you always use bought applique patterns, check kid's colouring-in books or stained glass pattern books and choose your own colours. If you always do needle-turn, try a raw edge (or vice-versa). Start small. Make placemats or cushions. If it doesn't work out it's not an entire quilt (unlike the Hidden Wells quilt I started, but ended up melting all the poly thread on :-( )

29 August 2014

Evolution of a quilt

I rarely follow quilt patterns. When I do follow a pattern it's usually a rather loose interpretation. This post is about a quilt I designed and how I ended up with something very different to what I planned.

Folk Welcome

A quilty friend agreed to do some knitting for me. I kinda conned her into it, so I thought a thank you would be appropriate. The friend likes folk music, banjos in particular (or maybe it's banjo players, I'm not sure). I went a-Googling for banjo images.

Not sure why it came up when I Googled "banjos", but I found this amazing quilt by Jen Sorenson from A Quilting Jewel:
http://aquiltingjewel.blogspot.com.au/2012/11/finished-guitar-quilt.html
I thought maybe I could do the same thing with banjos. I found this photo by George Banjos that I really liked:
http://www.georgebanjos.com/site_files/images/IMG_55932.jpg

I thought maybe I could 'treat' it the same as the guitars - with the overlaps in different colours to the bodies. I realised though, that this photo has a couple of extra stems, and the banjo in the front ended up all different colours with no real definition of its own. I removed the front banjo, but finally I decided that banjos are actually quite boring. My drawings were all looking like upside down lolly-pops or balloons.
Sort a maybe, but maybe not

I changed tack and went looking for folk music photos. I found a photo of a guitar, violin and banjo that I really liked. It's a Shutterstock photo, so you can see it on their website.

To simplify the photo I printed it and traced the outlines that I wanted in Sharpie, scanned it, and worked with the clean copy.

My plan was to make a wall-hanging. I work in Excel because it has no page borders - you can make things as big as you like. My first print was four by four A4 pages. I thought maybe it was too big, so I printed it again at two by two. But after discussion with my daughter, we both decided it looked better bigger rather than smaller.

At this stage, the plan was still to possibly use the colour technique from the first quilt. But I really liked the instrument grouping as it was, and the 3D of the guitar, in particular, would make it difficult.

The next step was to decide what fabrics to use. Although I'd given up on the overlapping colours I still wanted 'unreal' colours. I knew I didn't have the right fabrics in my stash and I didn't want to buy any. I'm trying to be "good" with the family budget.

I do have lots of 2 inch squares. "Easy", I thought, "Just patchwork it." Ah, famous last words. It sounds really easy in concept, not so easy in reality. I traced each piece - so the top half of the violin (for example), laid my 2 inch squares over the tracing, then sewed them together in rows. Then added more squares. Every time you sew two 2 inch squares together you lose a 1/2 inch; every four squares you lose a square. Even though I overlapped the squares when I laid them out, I don't think I got a single piece right first go. Some bits, like the narrow rim of the banjo, were harder to piece than others.

After I had all the pieces sewn in squarish shapes, I retraced the shapes on Vlsiofix - remembering to reverse them (almost forgot a couple of times), ironed the Vlsiofix to the fabric shapes and cut them out. It was quite exciting to see it actually start to come together.
The hard bit done. Patchwork laid out over my original 'pattern'.

My original plan was to simply edge stitch the instruments to a fleece as a single layer 'quilt', but I started to worry that the fleece would stretch and buckle. When I found a piece of black cotton fabric in my stash almost the perfect size I decided to use that, and back the quilt with fleece.

I had always planned to add the name "Folk Welcome"; the other design elements came about because it needed some spaces to be 'filled'. The font is called "Candle", with some modifications.

I layered the quilt - fleece backing, cotton top, patchwork and applique, and top-stitched/quilted in one go. The stitching holding the instruments, letters and music is the quilting. I used a black thread and blanket-stitch to edge everything. The instrument strings are stitched (again, as quilting) in silver metallic thread, which behaved surprisingly well. For a little extra, I used wooden jacket toggles for the violin's tuning pegs. Originally the pegs were part of the patchwork, but I didn't like it.
Violin tuning pegs. Only just now thought that I should/could have continued the strings from the quilting to the pegs. DUH!
If you look carefully, you can just make out the 'strings'.

The binding is 6 inch strips. Must remember next time to iron the seams OPEN. I usually join my binding strips with a 45° angle. Obviously that's impractical on 6 inch strips, so the seams are four layers thick, and I ironed all the seams to one side - so they're actually 8 layers thick.


Of course, the quilt has a label.

10 August 2014

Choir Tote


Although I always seem to have more bags than I know what to do with, I didn't have a suitable bag for choir. I wanted a dedicated bag, so I wouldn't be chasing up music and pencils and so on every week. I had a bit of a cursory look online for patterns but found nothing that really appealed to me, or met all my criteria:
  • big enough for my current folder of music, with potential for more to come
  • holder for my water bottle
  • pocket for my choir scarf
  • pockets for tea, pencils, erasers, and odd bits and bobs
The holder for my water bottle was pretty important; I'm always worried I'll forget to close it properly and it'll spill all through my music. We break for morning about 11am, which is far too late for me to be drinking caffeine, so I always carry my own decaf bags.

Our choir is called Jacaranda Jam (we're on Youtube at a school function, where we were 'invited guest performers' - Song 1Song 2, Song 3). Our 'uniform' is black and purple with the choir scarf, which is a swirl of blues, greens, and purples. I wanted my bag to reflect that colour scheme.

My plan became to make a simple tote - a rectangular bag, with a quilted outer, lining, pockets and shoulder straps. No fasteners or fancy bits. Just simplicity. I did not take photos as I went but the basic steps I took were:

1. Piece the squares together into a 6 x 10 'mini quilt top'. The bag is just this one piece.
2. Quilt the top and iron-on pellon with a fancy stitch over all the seams. I ummed and ahhed about whether to use bag wadding, which is stiff, but decided I didn't really need the bag to stand up on its own.
Quilting detail
3. Cut the lining fabric the same size as my finished 'top'.
4. Sew the pockets. All the pockets are double layers; no hems.
5. Sew the pockets to the lining fabric. The bottle holder has no base, and on a side seam. I used my actual water bottle to determine where to attach the sides of the holder. If the holder is sewn flat against the lining, it will pull.
6. Sew the lining into a tube, and partially sew the bottom seam in from both corners (about 4 or 5 inches).
7. Sew the outer into a  bag.
8. Sew the base corners (this site has great instructions for box corners) in the outer and lining.
9. Sew the handles.
10. Pin the handles, outer and lining together and sew around the top opening. Refill bobbin.
This little gap of about 4 stitches is where my bobbin ran out while sewing the outer and lining together.

11. Reinforce the handles. Because they come out from between the outer and lining, I folded them down the outer about an inch and then back up. Over that double layer I stitched a box with x through it.
Handle top-stitching for reinforcement
 12. When I made my box corners, I didn't cut off the extra bit. To firm up the base, I cut a piece of stiff bag wadding, and attached the ends of it to the box corner flaps.
13. Sew up the hole in the base of the lining.
14. Fill with stuff.
Inside


17 July 2014

To give ... or not to give

I'm really writing this post as a personal message. I guess that seems counter-intuitive; blogs are hardly personal. I want to share information with an individual, but I want to give them some space - only because I'm not sure if they need that or not. So, writing an impersonal blog seemed like a way to do that. As part of that 'giving space' idea, I've not named people, just used an initial. It's highly unlikely that anyone, who isn't 'someone', is likely to know exactly who I'm referring to.

In 2011, a friend of ours, who had struggled with mental illness for a long time, decided life really was just too hard. I cannot begin to imagine what it feels like to live in that grey space of constant despair, and to finally drop into the darkest of dark where hope doesn't penetrate.

We weren't exceptionally close friends. G (the friend) and K (his wife) had worked with hubby on a night-shift job. I'm guessing on night-shift you probably get to know people a bit better than in a 9-5 office job. I know my guard comes down when I'm tired and I can get a bit silly if I'm trying to stay awake. But that was hubby's journey with them, rather than mine.

I introduced K to the concept of quilting. I didn't really teach her anything. I lent her a book and talked to her, but obviously it inspired her to try. The quilts she made from that meagre introduction were a part of my journey to enjoy the art of quilt making; to not be so bound by the 'rules' and what "real quilters" might think. The quilts weren't technically brilliant and would have been slammed by judges at any quilt show, but they were art; they were personal expression; and they inspired me. There's a lot of freedom in that.

Because of that connection, when G died, I decided to make K a quilt. She mentioned considering travelling, so I wanted to keep it travel friendly. I'm not renowned for fast quilt making (I can, I just rarely do). It was nearly two years before I finished the quilt, even though it was reasonably simple. Life has a habit of taking unexpected turns, and by the time the quilt was finished, K had a new man in her life and she was happy again, and I wondered whether the quilt I'd made was appropriate. So, it's sat on my shelf and I've pondered what to do with it. It's quite personal; it's not something I could give to anyone else.


The answer was so simple I don't know why I didn't think of it earlier, and this post is part of the answer. If I can show K the quilt, without me being involved, she can decide if she would like it OR if she would like to give to another of G's friends, who might appreciate it. I'm hoping that by doing it this way, that veneer of politeness (which is all lovely and everything) might be avoided, and honest decisions can be made. I don't want K to take the quilt just because I'm standing right there and she feels she has to. Although I made it for her, I really made as a memory of G, and she feels it would be more appropriate to pass it on to someone else, I'm happy with that.

So, on with the photos.
G changed his name by deed poll to a Japanese name. I searched for it online and finally found the characters (I hope). The bottom section uses Japanese fabrics. He was also keen on sci-fi (introduced the Girl to HHGTTG), hence the night sky and stars.

The stripes are to fade into the night sky from the 'land' section.

What is difficult to see here are the green characters against the grass and bamboo tree background.

This is officially my first attempt at curved piecing. I like to think that's a nod to K, and that journey of discovery and freedom in art.


The shooting star represents his final journey, and his impact on people while he was here.

More stars

Not sure if it's obvious, but there is a shamrock, representing G's birth name.

18 June 2014

Pretty in Pink

A new grand-nephew was added to the family a few weeks ago. I thought about making him a quilt, but realised there were others ahead of him who were yet to receive quilts. I think my average completion time for a quilt is about 4 years, but it's amazing what you can do when you put your mind to it.

This quilt, by Pinetree Lodge (https://www.etsy.com/au/shop/pinetreelodge) was my original inspiration. I really like the monochrome colour scheme and highlight of the white. I planned to make the same quilt, or similar, in pink and white.
However, when I dug through my collection of scraps, all nicely pre-cut into 5, 3.5 and 2 inch squares, I found I had very few 5 inch pink squares. I'm not really fond of pink. I've used bits of it here and there, but the dozen or so pink charms I had simple weren't going to be enough.

I toyed with the idea of 9-patches, instead of single charms. Although I had plenty of 2 inch charms, I had lots of some fabrics, and only one or two of others. I needed at least four or five of each fabric for 9-patches.

9-patches are traditionally dark/light arrangements
Someone suggested 16-patches. 16-patches can be more random in placement. A four x four arrangement of 2 inch squares creates a finished 6 inch block, which is a nice size to work with.
The quilt started with digging out all my pink or part pink charms. I sorted them by fabric type, then distributed them into 16 piles of 16 fabric. No fabric is repeated in any pile. A couple (just one or two) fabrics appear in every pile; some only appear in one pile. Someone once told me that the secret to a scrappy quilt is that fabrics need to be repeated. If you repeat some fabrics, you can sew together just about anything you like. And so far, it seems to work for me.
16 piles of 16 charms, to make 16 16-patches
Once I had my piles, I started chain sewing. I took a pile of 16 squares, and sewed them into twos, without snipping threads in between. I put a piece of scrap fabric through the machine and continued with the next pile. When all the charms were sewn into pairs, I cut my long string apart at the scraps and then cut each section apart. This kept me from muddling up my piles. I then sewed my twos into fours; again, sewing a piece of scrap between the piles. Sewed my fours into 8s and my 8s into 16s.
Piles of 2 charms

Piles of four in a line

Four x twos

Half of the finished blocks
Digging through my scraps I found some pink homespun cut into binding strips. And I had enough to sash my 16 blocks. I didn't have enough to sash and corner stone the blocks, but I found a lovely piece of fabric with enough in it to cut cornerstones. In fact, I miscounted and cut twice as many cornerstones as I needed. There's forty sashing strips, but only 20 cornerstones.

To sew on the sashings, I add sashing to one side of every block. For four blocks, I added sashing to two sides. I sewed my blocks together in four strips of four. I then sewed sashings and cornerstones together - five lengths of five cornerstones and four sashings. I sewed one of these lengths to each strip of blocks; and two to one strip. Then I sewed my sashed strips together.


I toyed with various options for borders, and finally settled on adding a tiny spark of contrast. My first border was bright green, with pink highlights. The second border was a wide pink border. I did consider a pink first border, like the inspiration quilt, but decided it wouldn't work. The inspiration quilt didn't use cornerstones, which although small, change the dynamic of the quilt.
The quilt wasn't quite as large as I had envisaged, but consensus on Facebook was that it was finished and didn't need any more borders.

I decided to machine quilt it using my embroidery machine (the main reason I bought the machine). It's slow, it's a little tedious, but the results far outweigh anything I could do by hand or machine.
In the centre of my blocks I used a feathered circle and in the sashings a feathered heart (best seen on the back). I backed the quilt with polar fleece, which doubles as wadding. Two layers are much easier to manipulate in the machine hoops.

I surprised myself my not making a single mistake in the arrangement of the sashing quilting. The hearts are all alternating - both horizontally and vertically. I didn't want to create a "right side up". In the wide pink border I repeated the circle quilting, lining it up with the blocks. I could probably have repeated the hearts as well, but decided not to.

Finally, I sashed the quilt with the same green as the narrow border.
I started the quilt on Sunday afternoon and posted it the following Monday. Waiting to hear that it has arrived safe and sound.